Sunday, May 6, 2018

Kodak Vigilant Junior 620

Someone I know as a regular customer at work gave me a bag with a two cameras in it. One was a canon point and shoot that takes expensive batteries you can only buy on ebay for $12 and the other was a Kodak Vigilant Junior 620. I put the Kodak on the camera self and its sat there for about half a year because I really had barely intention to shoot it. Especially since it was unknown if the camera had light leaks or if the bellows were shot, and would just ruin whatever roll of film I volunteered for the first run.

Fast forward to the last few weeks, someone else at work gave me an brownie from 1937. I ordered a 3 pack of the Lomography 100 speed film, and somehow I garnered the motivation to re roll the 120 film onto the 620 spool and shoot these damned old cameras. My first attempt at re rolling film went bad and I did wrong. So the results for the brownie box camera didn't come out so great.

Well I got the re rolling thing figured out and decided to test it out on Kodak Vigilant instead of the brownie. 

So I drove downtown then decided, I didn't really care to shoot down there and figured whatever I guess I'll head to Old Sac, it has some interesting stuff going on, if you're not there every day.

The camera. The camera is simple.  Really simple, not as simple as the brownie Junior, but compared to cameras nowadays, yeah. It basically has 3 modes for the shutter, Interval - which is like 30th of a sec or something, Bulb - for long exposures, and  T - for the other bulb setting where you depress once and it stays open until you depress the shutter button again. There is an aperture, its goes from f12.5 to f32, so even though the shutter is only one speed you do get a little wiggle room with exposure, I used that when I was shooting, whether or not it helped, I'm not sure...

The view finder is simple as well and kinda cool. On the lens you have a little mirror view finder thingy that you use like a TLR not exactly viewed from at the waist, but more like mid torso, it can rotate to shoot portrait or landscape orientation. There is also a simple lens lesss flip up landscape finder on the body or what would be the top plate of the camera.

That is pretty much for functions and features, like all manual advance roll film cameras this one has the little window on the back that helps you properly advance the film to the next frame. I think this camera is a 6x9. I got 8 Shots out of a roll of 120.
 
All in all I had fun shooting this camera, and will likely shoot it again, I am curious about trying some black and white film in it.

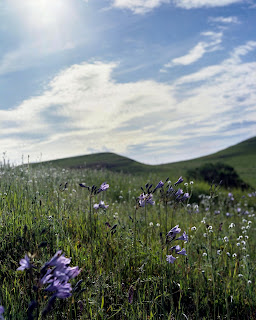
The film I shot was Lomography 100


Monday, November 6, 2017

Farts: Update

No one reads this blog so, at least I can write to myself. I've been busy doing nothing, expcept working and spending all my money on stupid camera shit, beer and mortgage payments. I have fell into the film photography trap and its awful, now theres 3x the amount of shit to potentially buy. I shoot in 35mm, 6x6 (120) and 4x5 I have many film cameras some work, some don't...  I mostly shoot 35mm with a minolta SRT202, cause' I have a decent lens setup for it. Medium format is an old Zeiss Ikon nettar with a leaf shutter, zone focus and twist knob type film advance. For large format I have two Graflexs, one is a Crown graphic with the standard lens the 147mm I think, the other is a speed graphic with a 50mm equivalent and a 20mm or wide angle and I made a  portrait type lens with a old russian large format lens attached to some black pvc pipe. Have been spending most photography time on lightroom or developing negatives. I've made some darkroom prints with some of the black and white stuff, its not anything to write home about though...


Tuesday, March 1, 2016

Make a ring light from a plastic cake lid

I was saying to myself the other day, "you know I'm gonna get down on it and make a ring light sometime here..." or something like that. Well despite how I thought it to myself, I did get around to making a ring light. Its almost finished, just need some transparent white stuff to cover the ring.


Components.
- A type of plastic lid. I used a cake dish lid from some grocery store bakery cake.
-Exacto knife
-something tubular or cylindrical to block the flash from the lens
-white spray paint (flat)
-Reflective duct tape
-some white transparent material to soften the flash
-duct tape
-White trash bag or something of similar properties that will diffuse the light
To build:
Firstly I spray painted the inside of the lid white.

I used a almost finished roll of gray duct tape to trace out the center circle that the lens will protrude into. I just marked the center of the dish, then eyeballed (guessed) where it was centered. I used the almost finished duct tape roll for tracing the outline.

Originally I cut the flash hole in the back of the dish, but I changed that location to the lip of the lid so that there is more light dispersion. I taped the bottom and half of the lip with reflective duct tape.
For the center hole, I just grabbed two disposable cups and cut them (to make two pieces)so that they were cylindrical like then taped them into the lens whole.

At this point its nearly finished, you could modify it here for your liking.

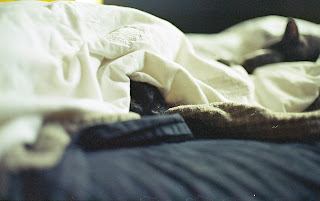
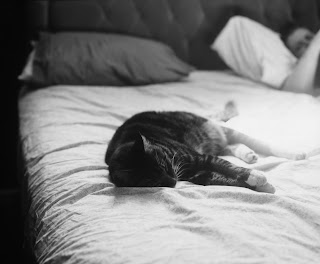
All the photos in this post were shot with the lens through the center of the ring flash, except for the one that' devoid of color and the flash is off to the side.

EDIT: So I topped all this off by covering the ring light recessed area with a white trash bag, and finally I taped off some of the inside diameter of the ring, effectively narrowing the area that the light will come through. At this point I think the project is finished. There are other DIY ring light projects out there, so if this doesn't seem your bag, fret not.
Ring Light finished, non human example. Unedited pic.

Ring Light finished

Ring light finished, taped off diameter

Luna Ring light

Myself ring light almost finished

Ragnar Ring light almost finished

Ring Light close to completion